Yes, it's true. 20 years old now. That makes me feel so old! I made him this card with the Inkadinkado Rock Star stamps. First time out of the packet and they stamped beautifully. I really like the stripe stamp too. It's Hero Arts Holiday Stripes and I used it with my stamp positioner to make sure the stripes lined up!
Tuesday, 22 December 2009
Saturday, 28 November 2009
My baby turns 18
Yup. No more children in my house. My youngest son turned 18 yesterday. This is the card I made for him. I chose an architecture theme because this is the subject he plans to study at university next year.
The background is a piece of 12x12 K&Co Life's Journey Architecture Studies. The left hand panel is a piece of card covered in crumpled tissue painted with three colours of Moonglow ink and highlighted with Distress Inks. The main image is an Illuminata stamp by Inkadinkado which I found in a box of clearance stamps at Ally Pally. There are three Stampbord 'spotlights' mounted on the image and the Architecture quote is from Beeswax stamps. The fibres are by Sara books and came with the key, which he'd seen when I bought them and already decided he wanted.
Sunday, 1 November 2009
More Christmas cards
I'm really enjoying these MME papers. This card is another simple layout.
The next card was originally inspired by a card in the Stampington gallery which I fell in love with when I first started crafting. It changed along the way and is now nothing like the card that inspired it. It is an A5 gatefold card. I don't have a good picture of the front as it didn't want to stay closed. But this is one side of the gatefold .
The base card is brown and I have scuffed the edges with gold ink. The inside looks like this.
Wednesday, 28 October 2009
Making a start on Christmas
I fell in love with these Inkadinkado stamps (a clear set called "Holiday Greetings") the first time I saw them. It was an impulse purchase quite out of character for me. But the more I use them the more I love them and I'm beginning to see how versatile they are going to be. In fact, I can imagine being able to do my whole 2009 card quota with these 6 stamps. Which would be a shame as I bought several other Inkadinkado sets very close to Christmas last year and never got to use them.
My starting point was a blog post from Stamp Talk with Tosh. I love the way she'd coloured the images and attempted to do something similar. I stamped a sheet of images and enjoyed working on them in front of the tv, using Distress Inks, the odd marker, 'puffy colours' (a dimensional medium with a glossy finish which Elaine kindly brought back for me from her European trip and which I used on the poinsettias) and my trusty Clear Stardust pen. You can just see the sparkle in the images at the top of the sheet. I was really pleased that I seemed to get a nice balance between subtle and glam.
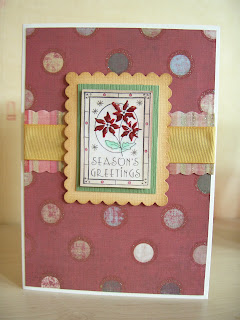
I managed to find the gorgeous Signature Christmas papers from My Mind's Eye to use with them and split the pack with my crafty friend Lesley. My first card was very simple but I thought the stamps needed very little to show them at their best.
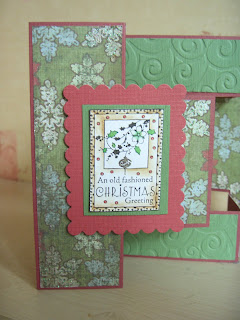
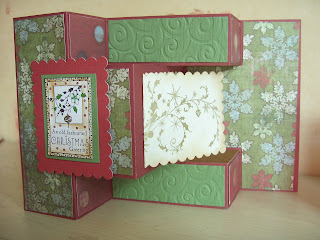
By accident I found that once mounted, the images were a nice size to go on my tri shutter card so that became my second card.
I decided to make the panel for the handwritten greeting into a little card-within-a-card and to stamp with an image from Winter Trails which co ordinates with the design on the front.
A third card is almost finished but needs a final touch. I feel I'm on a bit of a roll so maybe I'll find the missing piece for my card this evening.
Saturday, 19 September 2009
For Elaine
This was a card I sent to my crafting buddy Elaine who has just had a birthday. You may be able to tell from the photo that the gates are embossed onto acetate and are slightly bowed across the card. The plan was to have them open separately and lead to the inside of the card gatefold style. But I wanted them to have a bit of life so I scored them at the 'post' so they didn't lie too flat. But when I offered them up to the card to measure the fixing points, still in one piece, they formed the bow shape and I liked them that way. Of course the extra depth that created really warranted a box which wasn't part of the original plan. So I put them in a slightly more generous envelope and trusted to luck. Elaine is far too kind to tell me the true state the card arrived in but I fear it didn't look quite like this when it reached her.
The gate stamp is from Beeswax and the vegetation beyond the gate is from the Elusive Images Wild Flower plate. 'Imagine' is from Elusive Images WIGL plate.
Tuesday, 25 August 2009
Victorian Washstand Tile

This card was 100% inspired by a Victorian washstand tile. I made it as a challenge to myself when I found myself admiring the tile and then realised I had the stamps to reproduce all the elements. The card consists of a black mirri card background, a cream coloured frame mounted on foam tape and layered geraniums which are behind the frame at the base but 'grow' out over the frame. When I made my first attempt I stamped and embossed the frame and flowers on one piece of card. But I decided it was too flat so this version has a separate frame and two layers of flowers. The original flowers were coloured using Tinkabella inks. I loved the 'glazed' finish of the inks but the colour wasn't quite right. I'm still not entirely happy with the colour but these flowers are quite lustrous. They were painted with two shades of mica watercolours and then I used blended pink and orange Tinkabellas over the top. The tile had a butterfly in the top right corner and I was ready to stamp mine but then decided it was the perfect place for a greeting so I used a peel off instead.
The card blank was part of a mixed pack and is high gloss. I'm not sure I've seen anything like it for cardmaking before.
All stamps are by Elusive Images.
Wednesday, 19 August 2009
Strawberry season
I bought this little board crate full of strawberries a couple of months ago. I have to be honest and admit the crate appealed to me even more than the strawberries did. It slots together like those balsa wood model kits you can buy. So I took it apart, stamped and embossed on what had been the inside and put it back together inside out. The brown colour is original. In places it was slightly darker, almost as though it had been lightly scorched. So I touched it up with Distress Ink to enhance the effect. I'm really pleased with it because, for once, it actually turned out just the way I wanted it. I'd told myself if I messed it up I'd just have to force myself to eat another kilo of strawberries. But I haven't seen these since so it's as well I got it right first time.


In the photo it is modelling with ink pads but that's just so the pictures of the strawberries (now on the inside) don't detract from the design. I can't decide how to decorate the inside. I was going to do it with papers but I'd need to seal it as I want it to be robust enough to be of practical use to me.
Subscribe to:
Posts (Atom)